
It is important for organizations to understand where their sensitive data resides and what happens to their sensitive data.One of the areas that most organisations find it challenging to understand how people are interacting with sesnitive data is in the onpremise environment. Microsoft Purview includes the capabilities to discover sensitive data located in on-premise file shares that uses the Server Message Block (SMB) protocol and document libraries and folders for SharePoint server. This is achieved using the Azure Information Protection(AIP) scanner which can run in inspect mode or enforce mode to enable one to discover and understand their data before enforcing any changes.
In order to successfully deploy AIP Scanner, the following pre-requisites have to be in place;
- Windows server that will run the scanner– preferably, a dedicated windows 2016 and above server with the following additional network and server specs requirements provided here
- A service account that will be used to run the scanner service-The service account should have the logon as a service and logon locally rights on the server to be used and be synchronized with azure active directory. Read permissions should bee granted to the service account for the file shares to be scanned.(Read permission is enough only when running the scanner in discovery phase, more permissions might be required in enforce stage)
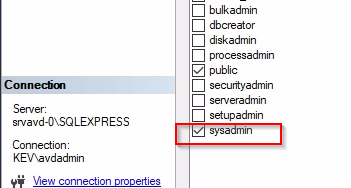
- SQL Server that will store the configuration and operational data of the scanner service- Microsoft SQL server 2016 and above is preferred. After installation make sure the service account has sysadmin rights on the database
The following are the steps to take to complete the scanner setup;
- Creating Sensitivity label for publishing
Ideally, we want the scanner to scan only for the sensitive information that is relevant to us, with this in mind, we will have to create a sensitivity label that will contain the relevant sensitive information types we want to discover. To achieve this, browse to https://compliance.microsoft.com and login with your credentials that have at least the compliance admin role and create a sensitivity label and publish the label to the service account to be used.
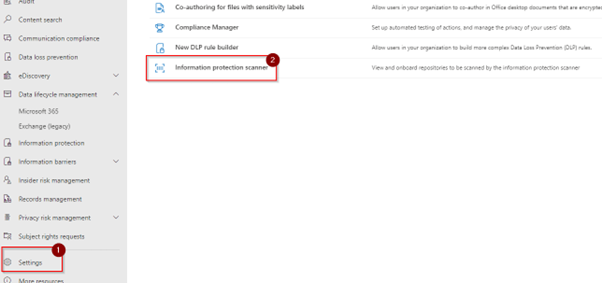
- Configure AIP Scanner in Purview portal
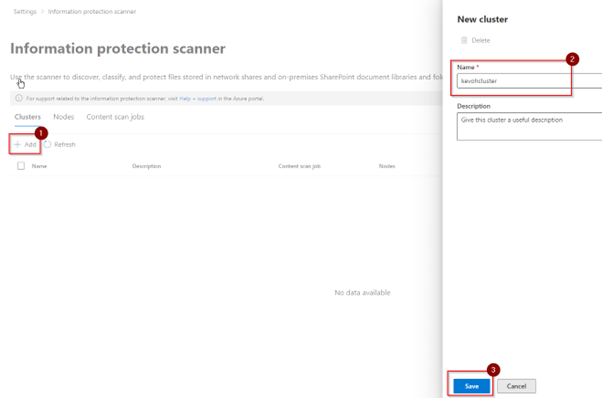
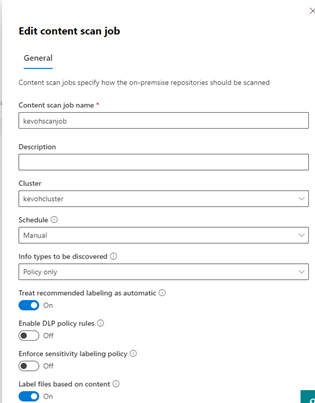
Before installing the scanner on the server, we need to create the scanner cluster and a content scan job. This capabilities were recently moved to the compliance portal under settings
We will then go ahead and create the scanner cluster
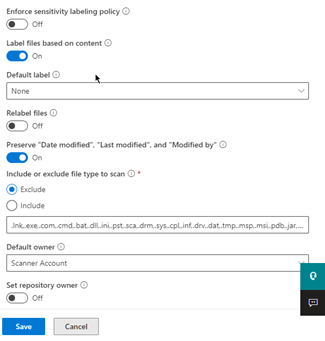
Then create select content scan job and leave the settings as below
Installing the AIP Scanner database
AIP Scanner requires a database to record the results from the scan that will be done in the server. You can download and install Microsoft SQL server express from Microsoft’s official download page
- Installing AIP Unified labeling client
The AIP Scanner relies on capabilities provided by the unified labelling client. This client can be downloaded from the official site here
- Installing the AIP Scanner
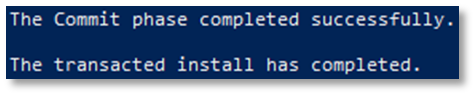
We will then install the AIP scanner via the windows PowerShell on the scanner server. For this, we will have to login to the server using the service account defined and run the below script to install the scanner
Install-AIPScanner
-SqlServerInstance SCAN-01\SQLExpress
-Profile “DataRiskCheck-ScannerCluster”

Then login with the service account if prompted to login. Once complete you should see the screen below
Verify the scanner is installed by checking on the services

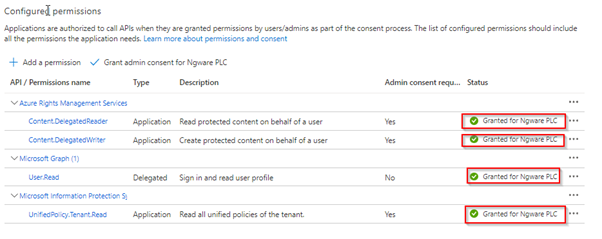
- Acquire Azure AD Token for the AIP Scanner
Azure AD Token is required so as to allow the AIP Scanner to authenticate to the AIP service. The token will be configured from the app registrations in Azure Portal. Visit https://portal.azure.com and login with your tenant admin credentials. Navigate to active directory and click on app registrations on the left. Register a new application and grant the below permissions while taking note of the App ID, the app secret and the tenant ID to be used in the next step.
The next step is to install the azure AD token on the scanner server using the following script
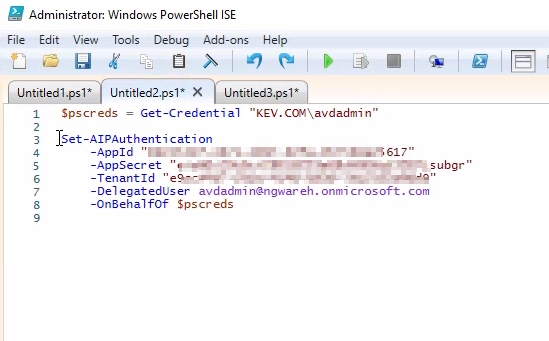
If successful you will see the output Acquired Access Token on behalf of KEV.COM\avdadmin

Restart the AIP Scanner service in the services list
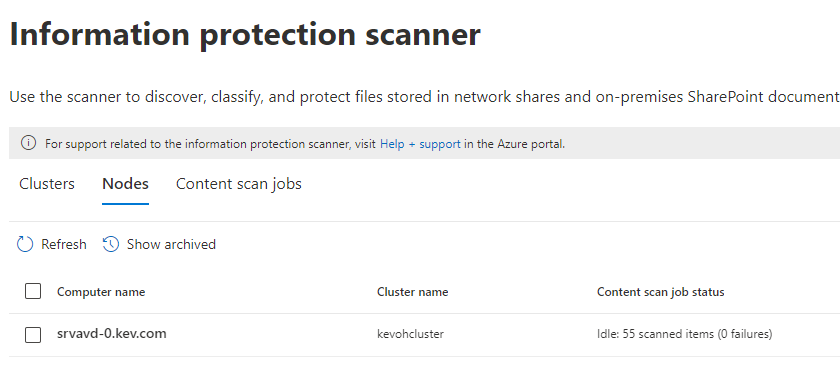
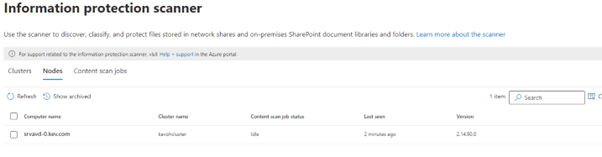
After completing this step we can go back to the compliance portal under the Information protection scanner and very the scanner node is visible and ready to perform the on-premise scanning
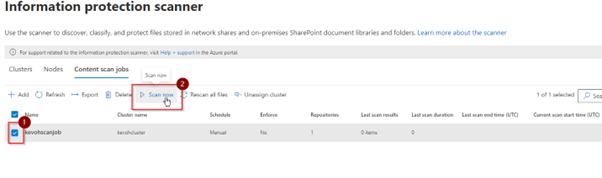
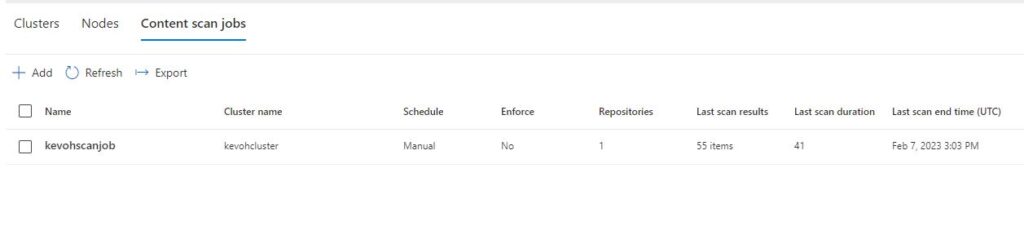
Then go to the content scan job tab and select the scan job the click scan now to start the on-premise scanning
Depending on the number of files to be scanned, the scanner will run and give you the results after a few minutes. Once the scanning has completed, you will see details below on the scanner node
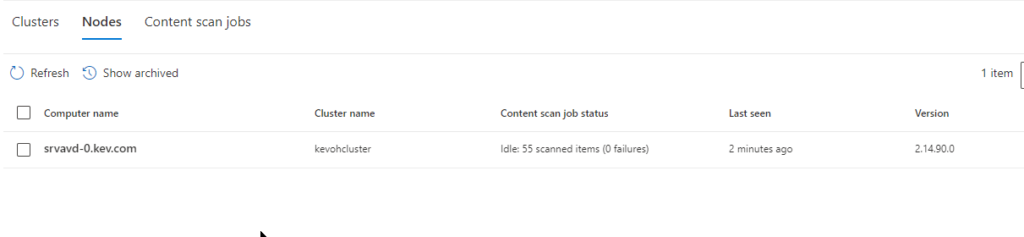
The content scan job will also give more details about the scan process and the duration taken to complete the scan
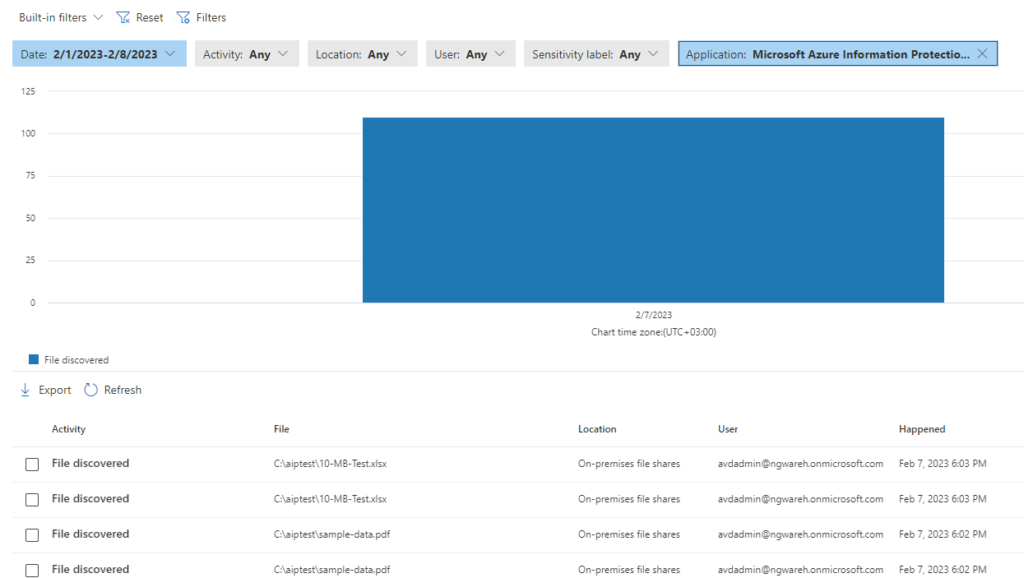
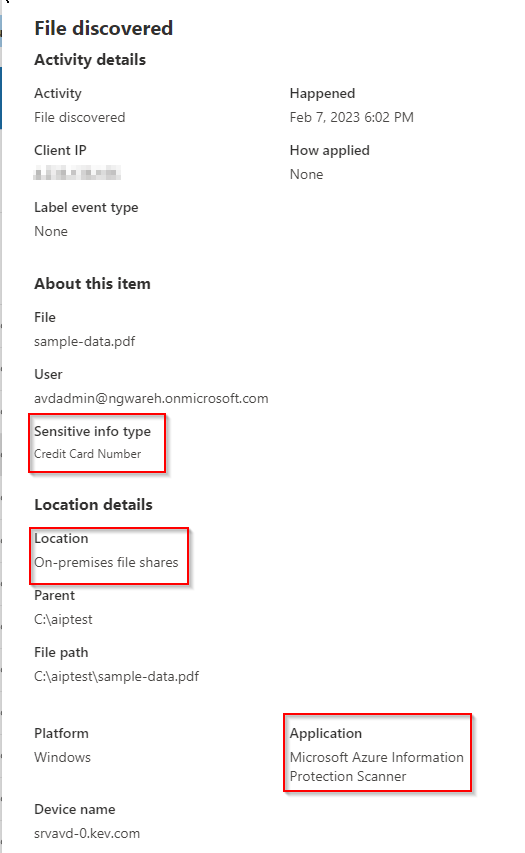
Finally to get a report on the scan results, we use the activity explorer under the data classification in the compliance portal.
Can I just say what a relief to seek out somebody who truly knows what theyre speaking about on the internet. You positively know the way to convey a difficulty to light and make it important. Extra individuals need to learn this and perceive this facet of the story. I cant imagine youre not more widespread because you positively have the gift.