
With the increase of data breach and wide variety of devices allowed to access organization data, it is important to setup measures to ensure organization data is protected and only shared with authorized people. Microsoft Purview Data Loss Prevention is a cloud native solution that can help you achieve this. With Microsoft Purview DLP, you get to benefit from the powerful artificial intelligence and machine learning capabilities of the cloud in protecting against data exfiltration. You can setup DLP policies that will be able to scan when a user is composing an email and the email has sensitive information that needs to be protected and automatically apply a sensitivity label and encrypt the email. Additionally, you can utilize adaptive protection to enforce DLP policies based on the risk level of the user that has been analysed by the AI and Machine Learning capabilities.In this series on DLP policies authoring, we will look at some of the Microsoft Purview Data Loss Prevention capabilities and how we can utilise them fully.
What you need to get started
Microsoft Purview DLP can be accessed from the compliance portal(compliance.microsoft.com). You need at least the compliance administrator role to access this portal. As of today, you will need the following license to use Microsoft Purview DLP:
- To setup DLP policies for Emails, SharePoint Online and OneDrive for Business, you will need the Microsoft 365 E5/A5/G5/E3/A3/G3, Microsoft Business Premium or Office 365 E5/A5/E3/A3/G3
- To setup Endpoint DLP you will need the Microsoft 365 E5/A5/G5
- To setup Microsoft Teams DLP, you will need Microsoft 365 E5/A5/G5 or Office 365 E5/A5/G5
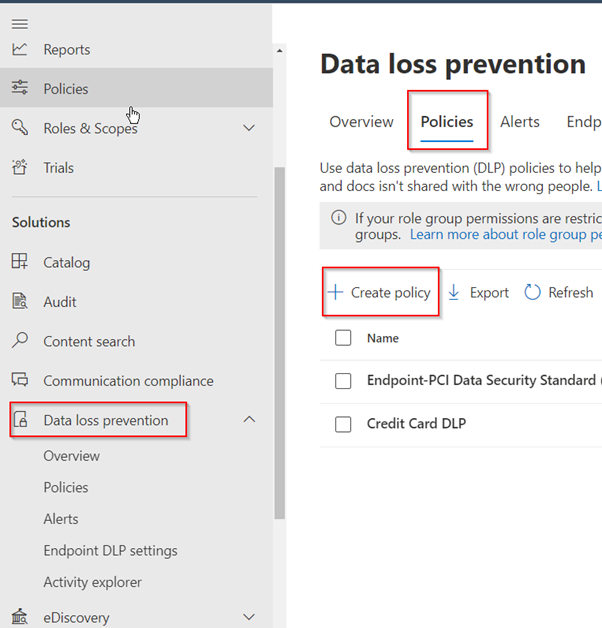
With this in place, you can now navigate to the Data Loss Prevention section in the compliance portal to create your policies. Data Loss Prevention > Policies
The WHYs and HOWs of DLP policies
When creating a DLP policy, you can start with the templates provided and edit out any part you want or a custom policy where you start from scratch and define your own policy the way you want. I prefer creating a custom policy because it gives the flexibility to be more creative when authoring the DLP, even though you can still edit the DLP from templates, I feel like the custom option is the best if you are comfortable with creating Microsoft Purview DLP policy.
You have to keep in mind the locations you want to target. It is best if you target each location with its individual policy i.e., you can create a DLP policy to specifically target email communications only and another one for endpoints only, in this way, you get to benefit from the wide pool of conditions and actions you can configure.
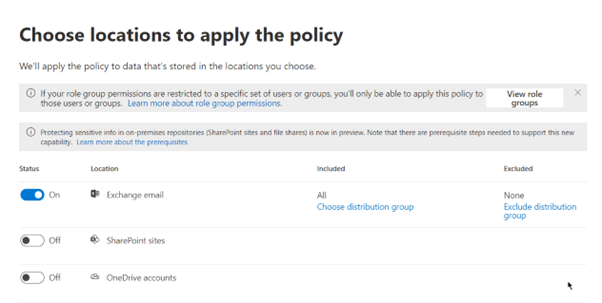
If you select just one location as shown above, you will have more conditions and actions to set for the DLP policy.
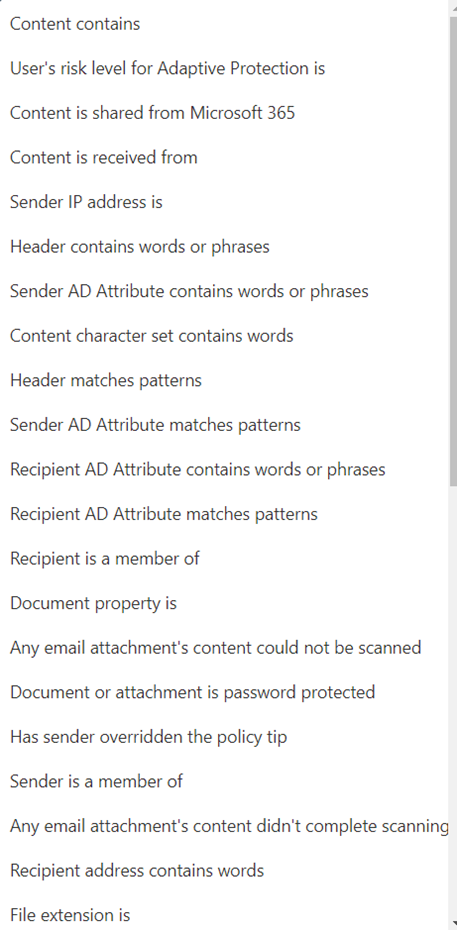
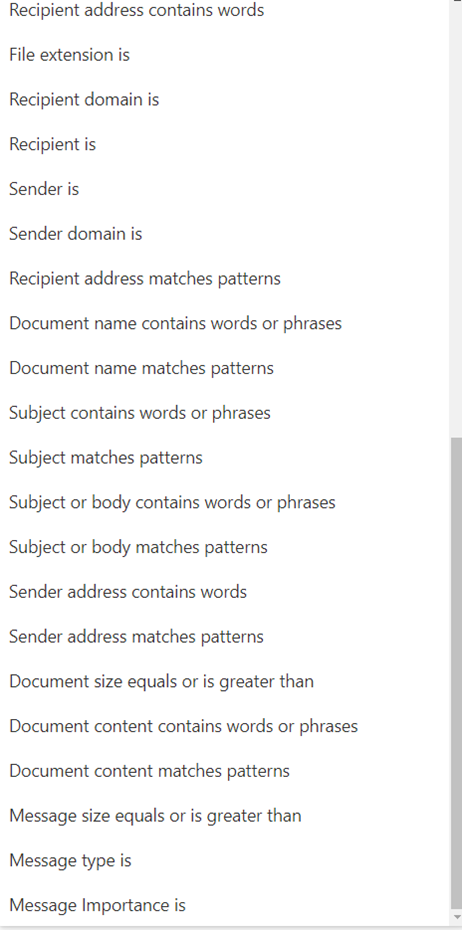
But when you select multiple locations for your DLP, you will get less conditions and actions to set for your DLP. This is because only the conditions and actions that is supported by the two locations you selected will be listed.
If we go back to the locations and select more than one location to apply the policy
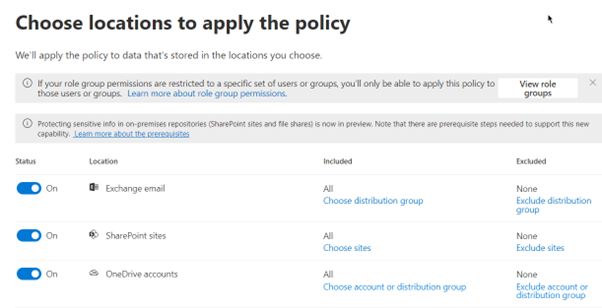
This will reduce the number of conditions and actions you can apply to the DLP policy so you will only see what can be supported by the multiple locations we selected
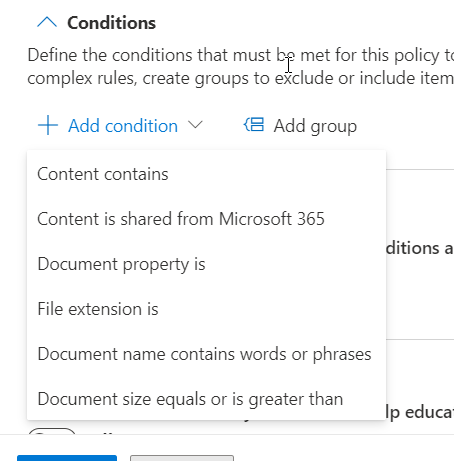
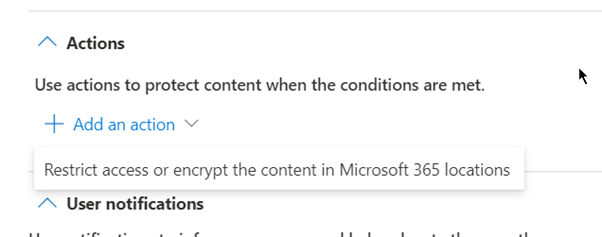
As you can see we now get less conditions and actions which might make your policy to be less effective than we want hence the recommended method of creating each location with its own policy to get the best results and coverage.
In my next part of DLP policy authoring, I will cover how we can utilize these conditions and actions to get the best out of Microsoft Purview Endpoint DLP.
I was excited to uncover this site. I need to to thank you for your time for this particularly wonderful read!! I definitely savored every part of it and I have you saved to fav to see new stuff in your site.
Good post. I learn something totally new and challenging on blogs I stumbleupon on a daily basis. Its always useful to read content from other authors and practice something from their websites.